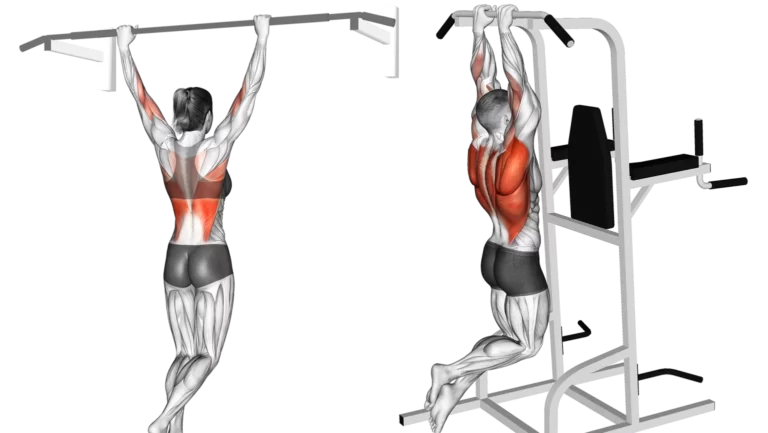
Push-ups are one of the most fundamental and effective bodyweight exercises, engaging multiple muscle groups in your upper body, core, and lower body, classified as Chest Exercises. They are a versatile exercise that can be modified to target different muscle groups and can be performed anywhere, anytime, without any equipment. Whether you’re a beginner or a seasoned athlete, push-ups can be a valuable addition to your workout routine.
Conventional Push-Ups
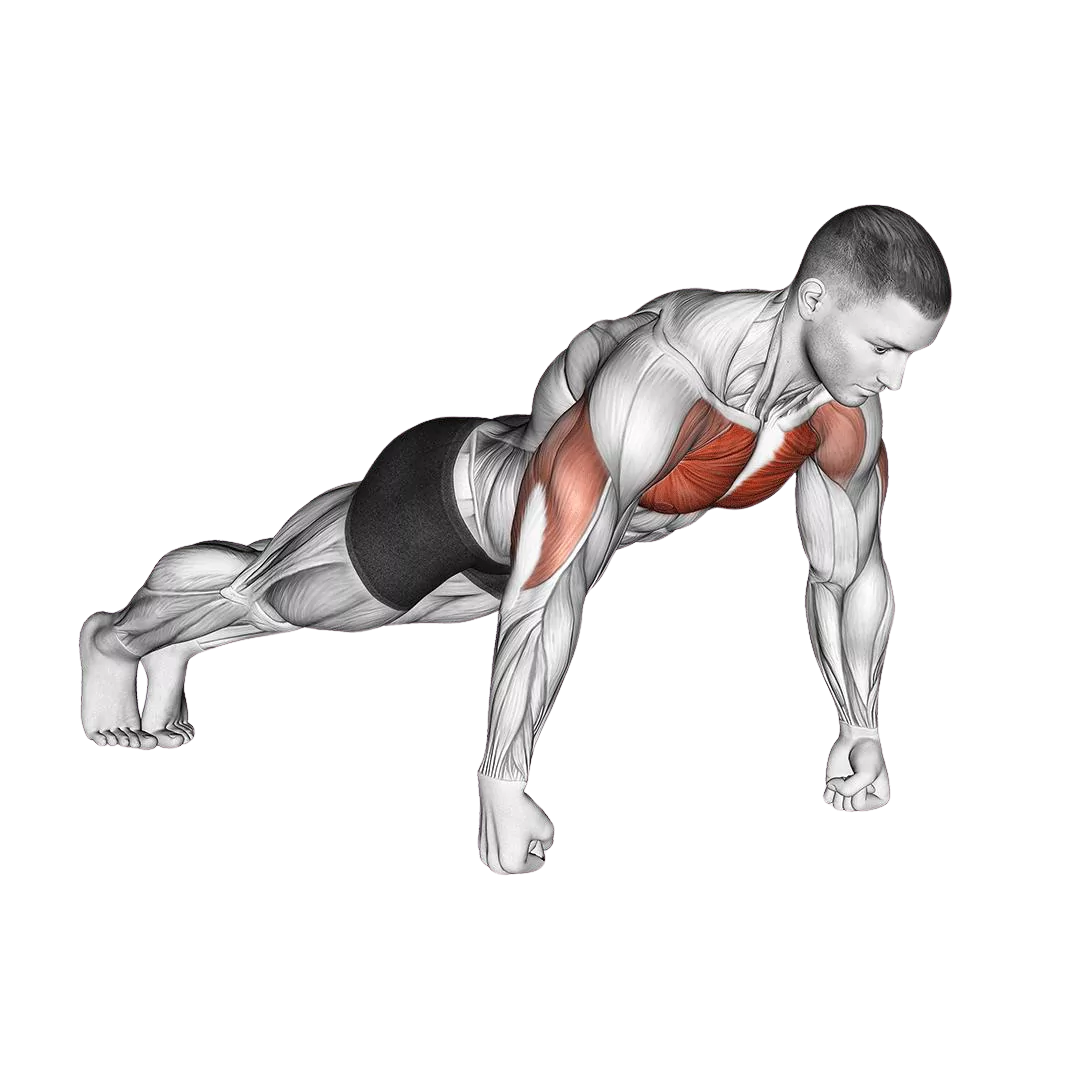
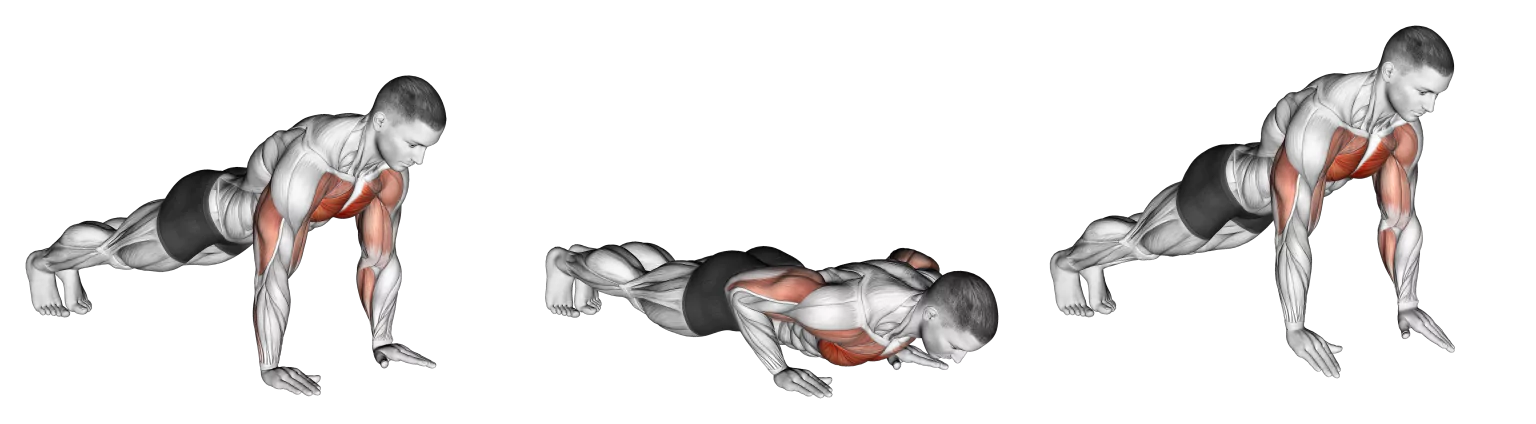
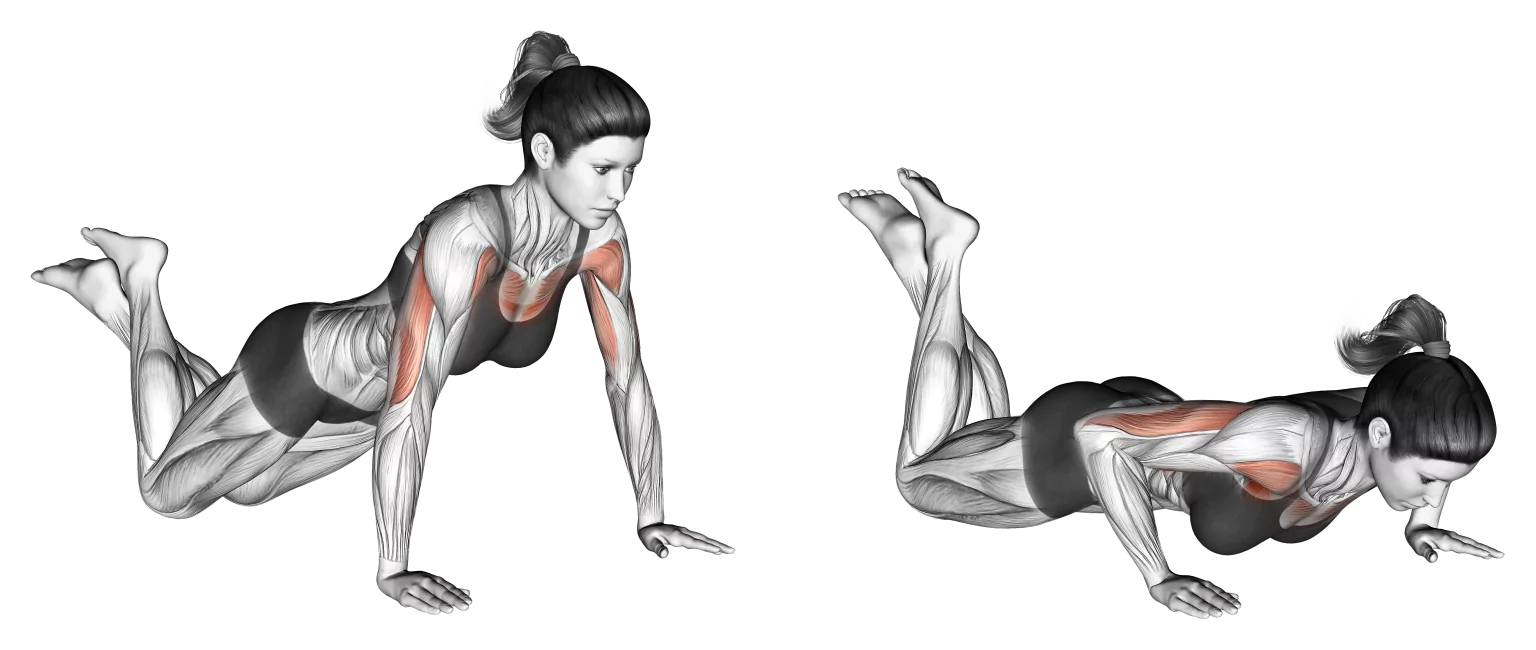
Conventional push-ups are a classic bodyweight exercise that primarily target the muscles in the chest, shoulders, triceps, and core. Here’s a step-by-step guide on how to perform conventional push-ups.
How to Do Conventional Push-Ups
1. Starting Position
- Start by positioning yourself face down on the floor with your hands placed slightly wider than shoulder-width apart. Your fingers should point forward or slightly outward.
2. Body Alignment
- Extend your legs straight behind you, toes touching the floor. Your body should form a straight line from your head to your heels. Engage your core to keep your body in a straight line.
3. Hand Placement
- Place your hands firmly on the floor, directly below your shoulders. Your wrists should be in line with your shoulders.
4: Elbow Position
- Keep your elbows close to your body as you lower yourself down. This helps to engage the triceps and prevent unnecessary strain on the shoulders.
5. Descent
- Lower your body towards the ground by bending your elbows. Aim to bring your chest as close to the ground as possible without actually touching it. Keep your body in a straight line throughout the movement.
6. Ascent
- Push through your palms to straighten your arms and return to the starting position. Fully extend your arms, but avoid locking your elbows to maintain tension in the muscles.
Muscles Worked
- Chest (Pectoralis Major): The primary muscle targeted in a push-up is the chest. The movement engages both the upper and lower portions of the pectoralis major.
- Shoulders (Deltoids): The anterior (front) part of the deltoids is worked as you push your body up.
- Triceps Brachii: The back of your arms, known as the triceps, is engaged as you extend your elbows during the upward phase of the push-up.
- Core Muscles: The muscles in your abdomen and lower back work to stabilize your body throughout the movement, contributing to overall core strength.
- Serratus Anterior: This muscle, located on the sides of your chest, is also engaged as you protract and retract your shoulder blades during the push-up.
Knuckle Push-Ups
Knuckle push-ups are a variation of the traditional push-up where you perform the exercise on your knuckles rather than with your palms flat on the ground. This variation can provide a different stimulus to your muscles and may be beneficial for those who find traditional push-ups uncomfortable on their wrists. Here’s a step-by-step guide on how to perform knuckle push-ups and the muscles they work.
How to Do Knuckle Push-Ups
1. Starting Position
- Begin by getting into the standard push-up position, with your hands slightly wider than shoulder-width apart. However, instead of having your palms on the ground, make fists with your hands so that you are on your knuckles.
2. Body Alignment
- Extend your legs straight behind you, keeping your body in a straight line from your head to your heels. Engage your core to maintain a stable position.
3. Hand Placement
- Place your knuckles on the ground directly below your shoulders. Make sure your fists are aligned with each other and facing forward.
4. Elbow Position
- Keep your elbows close to your body as you lower yourself down. This helps engage the triceps and chest muscles and reduces strain on the shoulders.
5. Descent
- Lower your body towards the ground by bending your elbows. Aim to bring your chest as close to the ground as possible without actually touching it. Keep your body in a straight line throughout the movement.
6. Ascent
- Push through your knuckles to straighten your arms and return to the starting position. Fully extend your arms, but avoid locking your elbows to maintain tension in the muscles.
Muscles Worked
- Chest (Pectoralis Major): Knuckle push-ups still primarily target the chest muscles, similar to conventional push-ups.
- Shoulders (Deltoids): The anterior (front) part of the deltoids is worked as you push your body up.
- Triceps Brachii: The triceps are engaged as you extend your elbows during the upward phase of the push-up.
- Core Muscles: The muscles in your abdomen and lower back work to stabilize your body throughout the movement, contributing to overall core strength.
- Wrist and Forearm Muscles: Performing push-ups on your knuckles places more demand on the muscles of the wrists and forearms.
Push-Up Handles
Push-up handles, also known as push-up bars or stands, are pieces of equipment that can be used to perform push-ups with a neutral wrist position. These handles elevate your hands off the ground, allowing for a greater range of motion and potentially reducing stress on the wrists. Here’s a step-by-step guide on how to use push-up handles and the muscles they work.
How to Do Push-Up Handles
- Setup:
- Place the push-up handles on the ground, shoulder-width apart.
- Grip the handles with a neutral wrist position, meaning your palms face each other.
- Starting Position:
- Assume a plank position with your body in a straight line from head to heels.
- Your hands should be directly below your shoulders on the push-up handles.
- Body Alignment:
- Keep your core engaged to maintain a straight line from your head to your heels.
- Descent:
- Lower your body towards the ground by bending your elbows. Aim to bring your chest as close to the handles as possible.
- Elbow Position:
- Keep your elbows close to your body as you lower yourself down. This engages the triceps and chest muscles.
- Ascent:
- Push through the handles to straighten your arms and return to the starting position. Fully extend your arms, but avoid locking your elbows to maintain tension in the muscles.
- Repeat:
- Perform the desired number of repetitions.
Muscles Worked
- Chest (Pectoralis Major): The primary muscle targeted in push-ups, using handles or not, is the chest. The handles may allow for a deeper stretch, engaging the chest muscles more.
- Shoulders (Deltoids): The anterior (front) part of the deltoids is worked as you push your body up.
- Triceps Brachii: The triceps are engaged as you extend your elbows during the upward phase of the push-up.
- Core Muscles: The muscles in your abdomen and lower back work to stabilize your body throughout the movement, contributing to overall core strength.
- Wrist Comfort: Push-up handles can reduce wrist discomfort by allowing a neutral wrist position, making it a suitable option for individuals with wrist issues.
Plyo Push-Ups
Plyo push-ups, short for plyometric push-ups, are an explosive variation of traditional push-ups that incorporate a jumping element. This exercise not only engages the muscles involved in a standard push-up but also adds a power component, making it a more dynamic and challenging movement. Here’s a step-by-step guide on how to perform plyo push-ups and the muscles they work.
How to Do Plyo Push-Ups
- Starting Position:
- Begin in a plank position with your hands placed slightly wider than shoulder-width apart.
- Descent:
- Lower your body towards the ground by bending your elbows. Aim to bring your chest close to the ground, maintaining a straight line from head to heels.
- Ascent:
- Explosively push through your palms to lift your upper body off the ground. The goal is to generate enough force to lift your hands off the ground.
- In-Air Transition:
- While in the air, quickly transition your hands to a wider position.
- Landing:
- Land with your hands in the wider position, absorbing the impact with a slight bend in your elbows. Your chest should be positioned higher than it was during the descent.
- Reset:
- Quickly reset your hands to the starting position and return to the plank position.
- Repeat:
- Perform the desired number of repetitions.
Muscles Worked
- Chest (Pectoralis Major): Plyo push-ups primarily target the chest muscles, especially during the explosive phase of the movement.
- Shoulders (Deltoids): The anterior (front) part of the deltoids is engaged as you push your body up and generate the explosive force.
- Triceps Brachii: The triceps are actively involved in the push-up and contribute to the explosive extension during the ascent.
- Core Muscles: Plyo push-ups require strong core engagement to stabilize the body during the explosive phase and landing.
- Plyometric Power Muscles: The jumping element of plyo push-ups engages fast-twitch muscle fibers and involves muscles responsible for explosive movements.
Diamond Push-Ups
Diamond push-ups are a variation of the traditional push-up that places greater emphasis on the triceps and inner chest. The name “diamond” comes from the shape your hands make when performing this exercise. Here’s a step-by-step guide on how to do diamond push-ups and the muscles they work.
How to Do Diamond Push-Ups
- Starting Position:
- Begin in a plank position with your hands directly beneath your chest, fingers forming a diamond shape (thumbs and index fingers touching, creating a triangle).
- Body Alignment:
- Keep your body in a straight line from head to heels. Engage your core muscles to maintain a stable position.
- Descent:
- Lower your body towards the ground by bending your elbows. Aim to bring your chest down towards your hands.
- Elbow Position:
- Keep your elbows close to your body as you descend, allowing them to brush against your sides. This places more emphasis on the triceps and inner chest.
- Ascent:
- Push through your palms to straighten your arms and return to the starting position. Fully extend your arms, but avoid locking your elbows to maintain tension in the muscles.
- Repeat:
- Perform the desired number of repetitions.
Muscles Worked
- Triceps Brachii: Diamond push-ups target the triceps more intensely than regular push-ups due to the hand positioning, making it an effective exercise for triceps development.
- Chest (Pectoralis Major): While the primary focus is on the triceps, diamond push-ups also engage the inner part of the chest.
- Shoulders (Deltoids): The anterior (front) part of the deltoids is worked as you push your body up.
- Core Muscles: The muscles in your abdomen and lower back work to stabilize your body throughout the movement, contributing to overall core strength.
- Serratus Anterior: This muscle, located on the sides of your chest, is engaged as you protract and retract your shoulder blades during the push-up.
Wide Push-Ups
Wide push-ups are a variation of the traditional push-up that targets the outer part of the chest and engages the shoulders and triceps. Here’s a step-by-step guide on how to do wide push-ups and the muscles they work.
How to Do Wide Push-Ups
- Starting Position:
- Begin in a plank position with your hands placed wider than shoulder-width apart. Your fingers should point forward or slightly outward.
- Body Alignment:
- Keep your body in a straight line from head to heels. Engage your core muscles to maintain a stable position.
- Descent:
- Lower your body towards the ground by bending your elbows. Aim to bring your chest down towards the space between your hands.
- Elbow Position:
- Allow your elbows to flare out to the sides as you descend. This widens the angle between your upper arms and torso, placing more emphasis on the outer part of the chest.
- Ascent:
- Push through your palms to straighten your arms and return to the starting position. Fully extend your arms, but avoid locking your elbows to maintain tension in the muscles.
- Repeat:
- Perform the desired number of repetitions.
Muscles Worked
- Chest (Pectoralis Major): Wide push-ups target the outer part of the chest, providing a different stimulus compared to standard push-ups.
- Shoulders (Deltoids): The anterior (front) part of the deltoids is engaged as you push your body up.
- Triceps Brachii: The triceps are actively involved in the push-up and contribute to the extension during the upward phase.
- Core Muscles: The muscles in your abdomen and lower back work to stabilize your body throughout the movement, contributing to overall core strength.
- Serratus Anterior: This muscle, located on the sides of your chest, is engaged as you protract and retract your shoulder blades during the push-up.
Knee Push-Ups
Knee push-ups, also known as modified push-ups, are an excellent variation for individuals who are working on building upper body strength or need a less challenging option than traditional push-ups. This modification reduces the amount of body weight you have to lift, making it a great starting point for beginners. Here’s a step-by-step guide on how to do knee push-ups and the muscles they work.
How to Do Knee Push-Ups
- Starting Position:
- Begin on your hands and knees, with your hands placed slightly wider than shoulder-width apart. Your wrists should be in line with your shoulders.
- Body Alignment:
- Extend your legs straight behind you, balancing on your knees. Your body should form a straight line from your head to your knees.
- Descent:
- Lower your chest towards the ground by bending your elbows. Keep your body in a straight line throughout the movement.
- Elbow Position:
- Keep your elbows close to your body as you lower yourself down. This engages the triceps and chest muscles.
- Ascent:
- Push through your palms to straighten your arms and return to the starting position. Fully extend your arms, but avoid locking your elbows to maintain tension in the muscles.
Muscles Worked
- Chest (Pectoralis Major): Knee push-ups engage the chest muscles, helping to build strength in the pectoralis major.
- Shoulders (Deltoids): The anterior (front) part of the deltoids is worked as you push your body up.
- Triceps Brachii: The triceps are engaged as you extend your elbows during the upward phase of the push-up.
- Core Muscles: The muscles in your abdomen and lower back work to stabilize your body throughout the movement, contributing to overall core strength.
- Serratus Anterior: This muscle, located on the sides of your chest, is engaged as you protract and retract your shoulder blades during the push-up.
Sphinx Push-Up
The Sphinx Push-Up is a variation of the traditional push-up that targets the muscles in the chest, triceps, shoulders, and core. Here’s how you can perform Sphinx Push-Ups.

How to Do Sphinx Push-Up
- Starting Position:
- Begin by lying face down on the floor with your elbows bent and directly under your shoulders.
- Place your forearms on the ground, parallel to each other, with your palms facing down.
- Body Alignment:
- Keep your legs extended and toes pointed, forming a straight line from your head to your heels.
- Engage your core muscles to maintain a neutral spine.
- Lift Your Body:
- Push through your forearms to lift your chest and upper body off the ground.
- Your elbows should remain bent at a 90-degree angle, and your weight should be supported by your forearms and toes.
- Controlled Descent:
- Slowly lower your body back down to the starting position without letting your chest touch the ground.
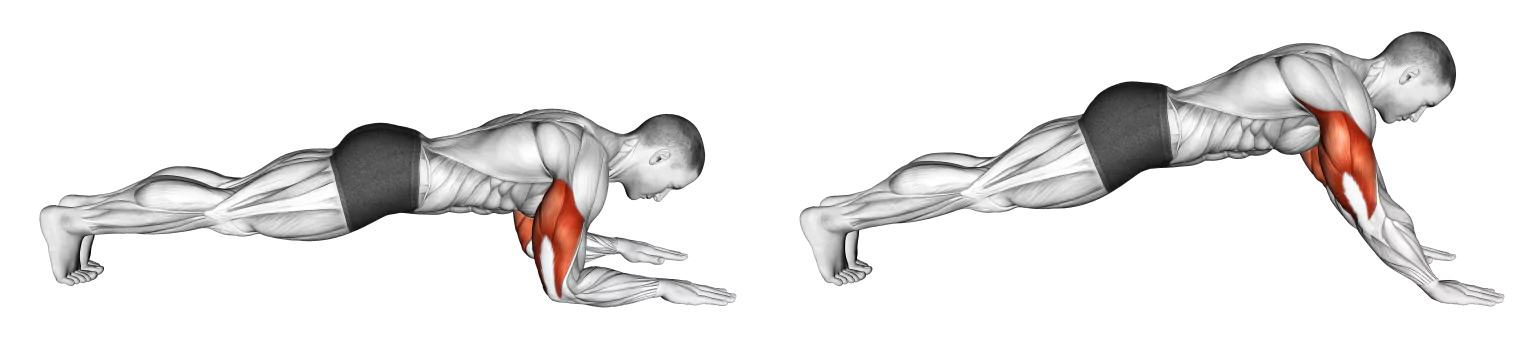
Muscles Worked
- Chest (Pectoralis Major): The main muscle worked during Sphinx Push-Ups is the chest. The movement engages both the upper and lower parts of the chest.
- Triceps Brachii: The triceps are heavily involved in extending the elbow joint as you push your body away from the floor.
- Shoulders (Deltoids): The anterior (front) part of the shoulders is activated during the upward phase of the push-up.
- Core Muscles: The muscles of the core, including the rectus abdominis and transverse abdominis, are engaged to stabilize the body and maintain a straight line from head to heels.
- Serratus Anterior: This muscle, located on the sides of the chest, is involved in the protraction of the shoulder blades, which occurs during the push-up movement.
Band Assisted Push-Ups
Band-assisted push-ups are a great modification for individuals who are working on building strength for traditional push-ups or need assistance due to various reasons. This exercise uses resistance bands to make push-ups more manageable while still engaging the muscles involved in the movement. Here’s a step-by-step guide on how to perform band-assisted push-up.

How to Do Band Assisted Push-Ups
- Set Up:
- Lay the resistance band on the floor and position it in a straight line.
- Step on the band with your hands, ensuring that it’s centered under your palms.
- Hand Placement:
- Assume a plank position with your hands slightly wider than shoulder-width apart.
- Your body should form a straight line from your head to your heels.
- Band Placement:
- Adjust the position of the band so that it runs across your upper back, just below the shoulder blades.
- Hold one end of the band in each hand.
- Perform the Push-Up:
- Lower your chest toward the floor while keeping your body in a straight line.
- The band will provide assistance by helping you up as you press back to the starting position.
- Controlled Movement:
- Focus on a controlled descent and ascent to ensure that you’re actively engaging your muscles throughout the entire range of motion.
Muscles Worked
- Chest (Pectoralis Major): Band-assisted push-ups target the chest muscles, helping to develop strength and endurance in the pectoral region.
- Triceps Brachii: The triceps are engaged as you extend your elbows during the upward phase of the push-up.
- Shoulders (Deltoids): The anterior (front) part of the shoulders is activated during the pushing motion.
- Core Muscles: Your core muscles, including the rectus abdominis and transverse abdominis, work to stabilize your body throughout the exercise.
- Scapular Stabilizers: Muscles such as the serratus anterior and rhomboids are involved in stabilizing the shoulder blades as you move through the push-up motion.
Shoulder Tap Push-Ups
Shoulder tap push-ups are a dynamic variation of the traditional push-up that adds an element of stability and core engagement. This exercise targets the muscles involved in a standard push-up while also incorporating an anti-rotation component with the shoulder taps. Here’s a step-by-step guide on how to perform shoulder tap push-ups.
How to Do Shoulder Tap Push-Ups
- Starting Position:
- Begin in a plank position with your hands placed slightly wider than shoulder-width apart.
- Ensure your body forms a straight line from head to heels, engaging your core muscles.
- Perform a Push-Up:
- Lower your chest toward the ground by bending your elbows, maintaining a straight line with your body.
- Push back up to the starting plank position.
- Shoulder Tap:
- After returning to the plank position, lift your right hand off the ground and tap your left shoulder.
- Place your right hand back on the ground.
- Alternate Sides:
- Lift your left hand off the ground and tap your right shoulder.
- Continue to alternate shoulder taps after each push-up.
- Maintain Stability:
- Focus on keeping your hips square to the ground and minimizing body rotation as you tap your shoulders.
- Engage your core to prevent excessive swaying.
Muscles Worked
- Chest (Pectoralis Major): The pushing motion engages the chest muscles, similar to a traditional push-up.
- Triceps Brachii: The triceps are activated during the extension phase of the push-up.
- Shoulders (Deltoids): Both the anterior (front) and lateral (side) deltoids are engaged, especially during the shoulder tap component.
- Core Muscles: Shoulder tap push-ups significantly target the core muscles, including the rectus abdominis, obliques, and transverse abdominis, to maintain stability during the shoulder taps.
- Scapular Stabilizers: Muscles like the serratus anterior and rhomboids are involved in stabilizing the shoulder blades, especially during the plank position.
- Anti-Rotation Muscles: The muscles responsible for preventing rotation, such as the obliques, play a crucial role in keeping the body stable during the shoulder taps.
Shoulder Push-Up
It seems there might be a confusion in your question, as “Shoulder Push-Up” isn’t a standard term for a known exercise. However, if you are referring to a specific type of push-up that heavily engages the shoulders, I can provide guidance on a few variations that are particularly effective for targeting the shoulder muscles.
How to Do Pike Push-Up
- Starting Position:
- Begin in a plank position with your hands placed slightly wider than shoulder-width apart.
- Form a Pike Position:
- Lift your hips towards the ceiling, forming an inverted V or pike position with your body.
- Your head should be positioned between your arms, and your heels should be pressing towards the floor.
- Perform the Push-Up:
- Bend your elbows and lower your head towards the floor, keeping your body in a straight line.
- Push back up to the starting pike position.
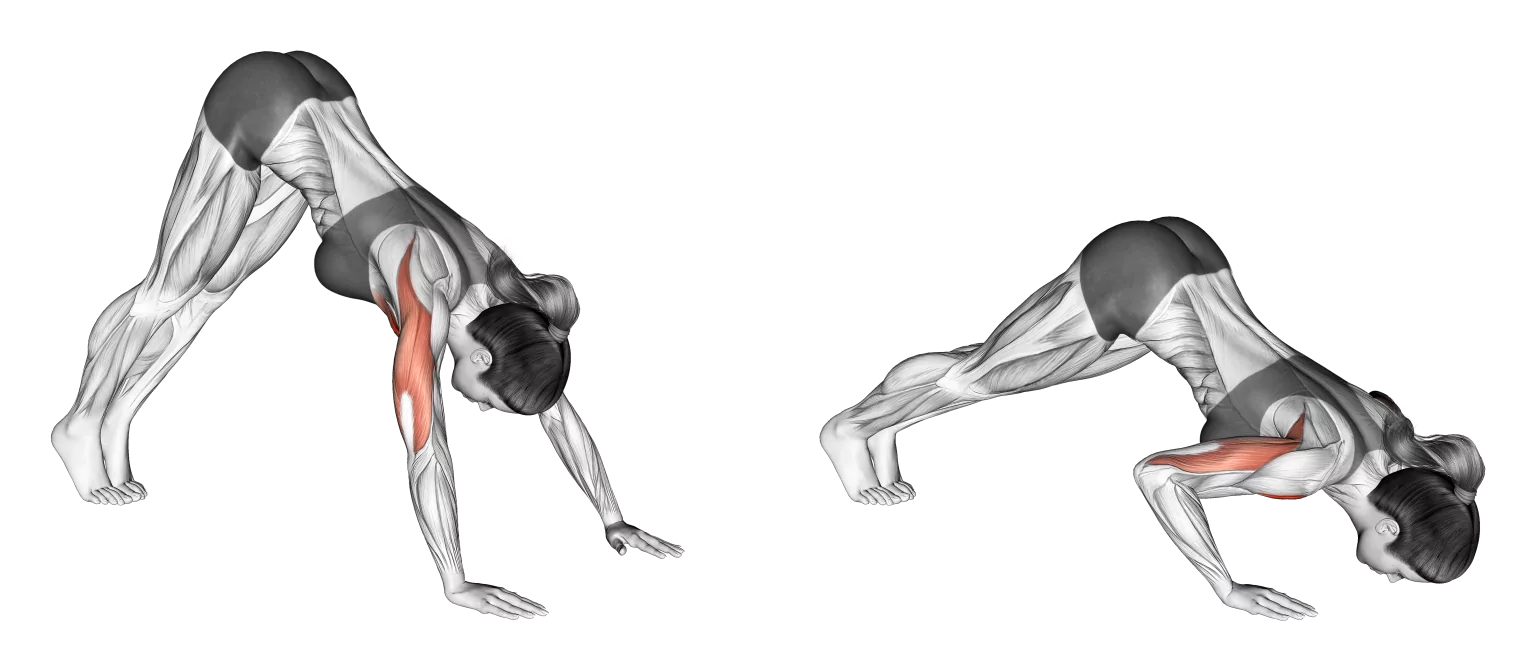
Muscles Worked
- Shoulders (Deltoids): The pike position and push-up motion heavily engage the shoulder muscles, particularly the anterior (front) deltoids.
- Triceps Brachii: The triceps are activated during the pushing phase of the exercise.
- Upper Chest (Upper Pectoralis): The pike position targets the upper part of the chest.
- Core Muscles: Pike push-ups also engage the core muscles, including the rectus abdominis and transverse abdominis, to stabilize the body in the inverted position.
- Serratus Anterior: This muscle, located on the sides of the chest, is involved in stabilizing the shoulder blades during the movement.
Decline Shoulder Push-Ups
It seems there might be a slight misunderstanding in the term “Decline Shoulder Push-Ups” as it’s not a standard or commonly recognized exercise. However, I can provide you with information on how to perform a variation of push-ups that could be similar and that targets the shoulders.
How to Do Decline Pike Push-Ups
- Setup:
- Position yourself in a plank position with your hands placed on an elevated surface, such as a bench or box.
- Elevate your hips, so your body forms an inverted V shape.
- Hand Placement:
- Place your hands slightly wider than shoulder-width apart on the elevated surface.
- Pike Position:
- Lift your hips towards the ceiling, forming a pike position with your body.
- Your head should be positioned between your arms, and your heels should be pressing towards the floor.
- Perform the Push-Up:
- Bend your elbows and lower your head towards the elevated surface, keeping your body in a straight line.
- Push back up to the starting pike position.
Muscles Worked
- Shoulders (Deltoids): The pike position and push-up motion engage the shoulder muscles, particularly the anterior (front) deltoids.
- Triceps Brachii: The triceps are activated during the pushing phase of the exercise.
- Upper Chest (Upper Pectoralis): The elevated position targets the upper part of the chest.
- Core Muscles: Decline pike push-ups engage the core muscles, including the rectus abdominis and transverse abdominis, to stabilize the body in the inverted position.
- Serratus Anterior: This muscle, located on the sides of the chest, is involved in stabilizing the shoulder blades during the movement.
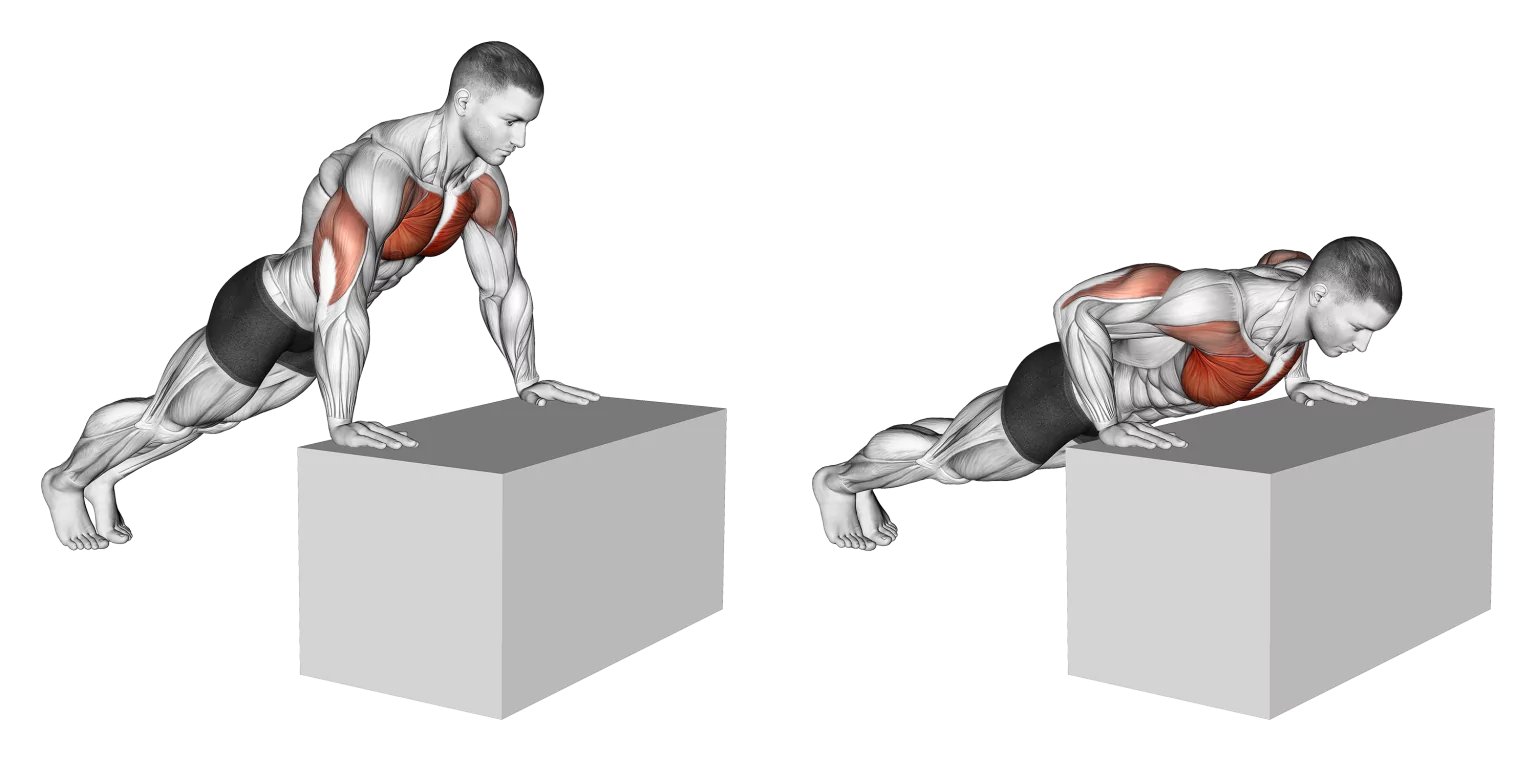
Decline Push-Ups
Decline push-ups are a challenging variation of the traditional push-up that targets the upper chest, shoulders, and triceps. This exercise involves elevating your feet, placing them on a higher surface than your hands. Here’s a step-by-step guide on how to perform decline push-ups.
How to Do Decline Push-Ups
- Setup:
- Place your hands on the floor, slightly wider than shoulder-width apart.
- Position your feet on a stable elevated surface, such as a bench, step, or plyo box. The higher the surface, the more challenging the exercise.
- Body Alignment:
- Ensure your body forms a straight line from head to heels.
- Engage your core muscles to maintain a stable plank position.
- Perform the Push-Up:
- Lower your chest towards the floor by bending your elbows, maintaining a straight line with your body.
- Keep your elbows at a 45-degree angle to your body.
- Push Back Up:
- Push through your palms to extend your elbows and return to the starting position.
Muscles Worked
- Upper Chest (Upper Pectoralis): Decline push-ups emphasize the upper part of the chest, helping to develop strength and definition in this area.
- Shoulders (Deltoids): The anterior (front) deltoids are engaged during the pushing motion.
- Triceps Brachii: The triceps are activated as you extend your elbows during the upward phase of the push-up.
- Core Muscles: Decline push-ups require increased core engagement to stabilize the body in the elevated position.
- Serratus Anterior: This muscle, located on the sides of the chest, is involved in stabilizing the shoulder blades.
- Scapular Stabilizers: Muscles like the rhomboids and traps help stabilize the shoulder blades as you move through the push-up motion.
Incline Push-Ups
Incline push-ups are a beginner-friendly variation of the traditional push-up that allows you to gradually build strength in your upper body. This exercise is performed with your hands on an elevated surface, such as a bench or countertop, making it less challenging than regular push-ups on the floor. Here’s a step-by-step guide on how to perform incline push-ups.
How to Do Incline Push-Ups
- Setup:
- Place your hands on the elevated surface, slightly wider than shoulder-width apart.
- Step back and position your feet so your body forms a straight line from head to heels.
- Body Alignment:
- Maintain a neutral spine by engaging your core muscles.
- Your body should be inclined at an angle, with your hands on the elevated surface and your feet on the ground.
- Perform the Push-Up:
- Lower your chest towards the elevated surface by bending your elbows.
- Keep your elbows at a 45-degree angle to your body.
- Push Back Up:
- Push through your palms to extend your elbows and return to the starting position.
- Repeat:
- Perform the desired number of repetitions while maintaining proper form and control.
Muscles Worked
- Chest (Pectoralis Major): Incline push-ups primarily target the chest muscles, helping to develop strength and endurance in the pectoral region.
- Shoulders (Deltoids): The anterior (front) deltoids are engaged during the pushing motion.
- Triceps Brachii: The triceps are activated as you extend your elbows during the upward phase of the push-up.
- Core Muscles: Incline push-ups engage the core to a lesser extent than traditional push-ups but still require stabilization to maintain proper body alignment.
- Serratus Anterior: This muscle, located on the sides of the chest, is involved in stabilizing the shoulder blades.
- Scapular Stabilizers: Muscles like the rhomboids and traps help stabilize the shoulder blades during the movement.
Incline Push-Up
Certainly! Here’s a guide on how to perform incline push-ups and the muscles worked
How to Do Incline Push-Up
- Setup:
- Place your hands on the elevated surface, slightly wider than shoulder-width apart.
- Step back and position your feet so your body forms a straight line from head to heels.
- Body Alignment:
- Keep your body in a straight line from head to heels. Ensure your back is flat, and your core is engaged.
- Hand Placement:
- Your hands should be positioned slightly wider than shoulder-width apart.
- Adjust the height of the surface based on your fitness level; a higher surface will make the exercise easier.
- Perform the Push-Up:
- Lower your chest towards the elevated surface by bending your elbows.
- Keep your elbows at about a 45-degree angle to your body.
- Push Back Up:
- Push through your palms to extend your elbows and return to the starting position.
Muscles Worked
- Chest (Pectoralis Major): Incline push-ups target the chest muscles, specifically the pectoralis major.
- Shoulders (Deltoids): The anterior (front) deltoids are engaged during the pushing motion.
- Triceps Brachii: The triceps, located at the back of the arms, are activated as you extend your elbows during the upward phase.
- Serratus Anterior: This muscle, located on the sides of the chest, is involved in stabilizing the shoulder blades.
- Scapular Stabilizers: Muscles like the rhomboids and traps help stabilize the shoulder blades during the movement.
- Core Muscles: Incline push-ups engage the core to a lesser extent than traditional push-ups, but they still require stabilization to maintain proper body alignment.
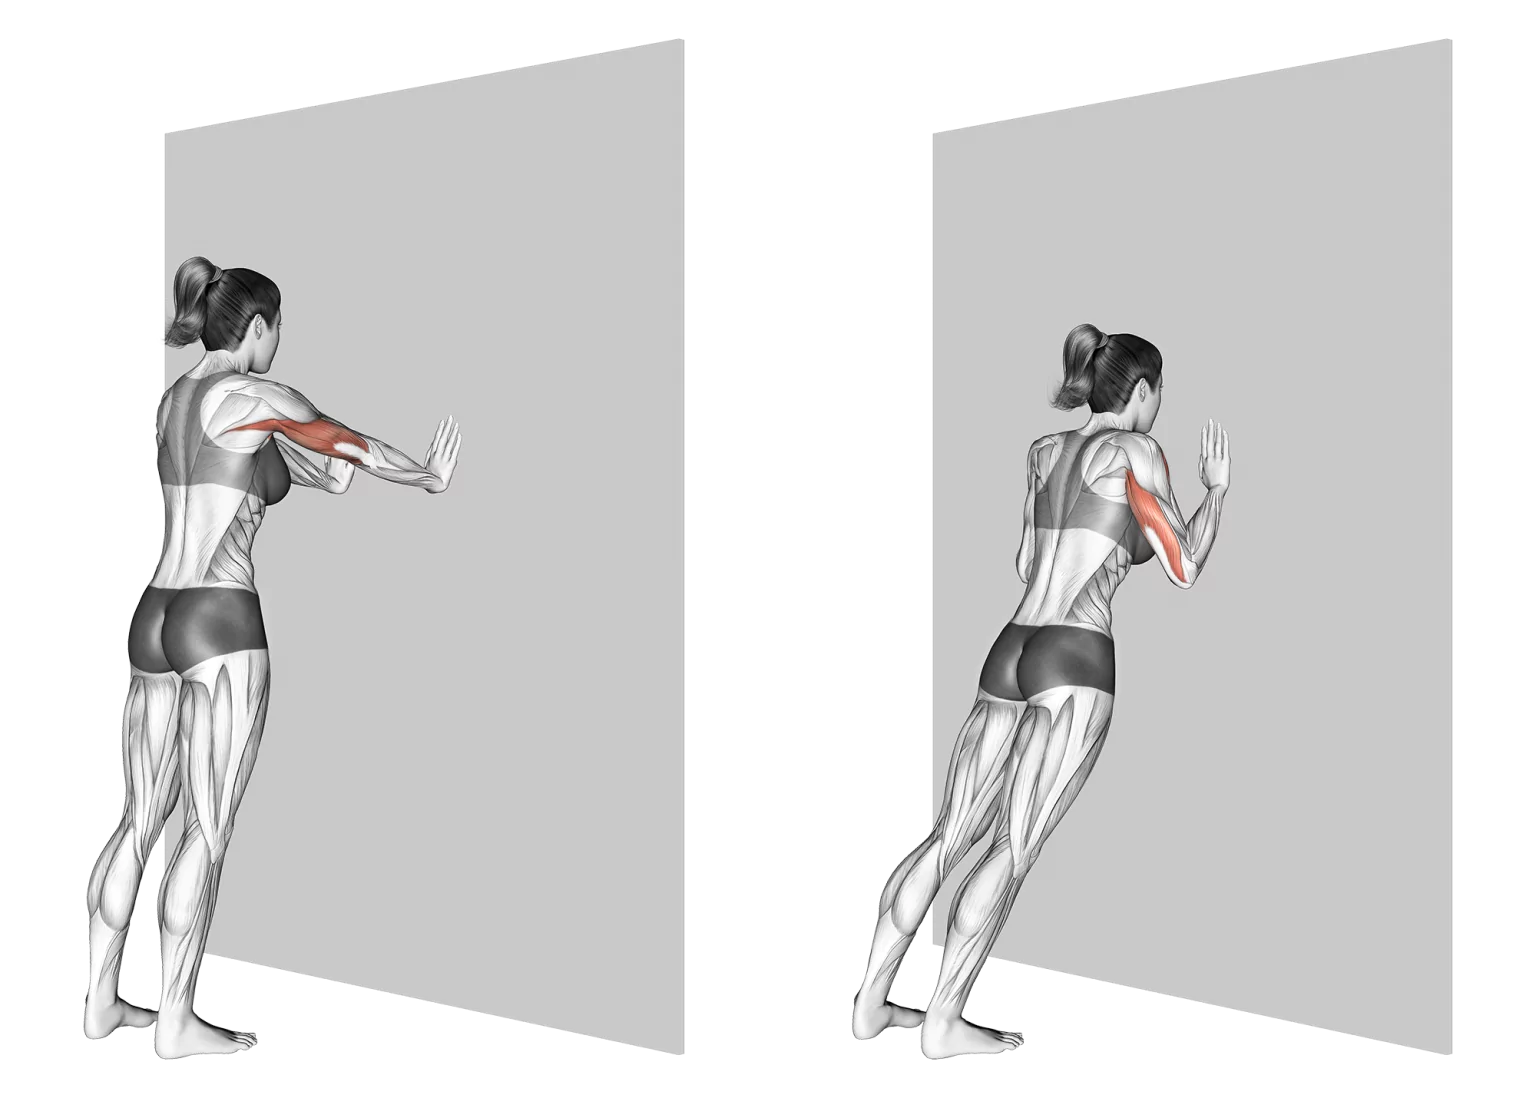
Wall Push-Up
How to do Wall Push-Up
- Stand facing a wall with your feet hip-width apart.
- Place your hands on the wall at shoulder height, slightly wider than shoulder-width apart.
- Your arms should be straight, and your body should form a slight angle with the wall.
Execution
- Lean towards the wall by bending your elbows, bringing your chest closer to the wall.
- Keep your body in a straight line from head to heels.
- Lower your chest toward the wall until your nose almost touches it.
- Push through your palms to return to the starting position, straightening your arms.
Muscles Worked
- Chest (Pectoralis Major): Wall push-ups engage the chest muscles, helping to develop strength and endurance in the pectoral region.
- Shoulders (Deltoids): The anterior (front) deltoids are activated during the pushing motion.
- Triceps Brachii: The triceps, located at the back of the arms, are involved as you extend your elbows during the upward phase.
- Serratus Anterior: This muscle, located on the sides of the chest, is engaged in stabilizing the shoulder blades.
- Scapular Stabilizers: Muscles like the rhomboids and traps help stabilize the shoulder blades during the movement.
- Core Muscles: While not as demanding as other variations, wall push-ups still engage the core muscles to stabilize your body during the movement.
Handstand Push-Up
The handstand push-up is an advanced bodyweight exercise that targets the shoulders, triceps, and upper back. It requires both strength and balance. Before attempting handstand push-ups, ensure that you are comfortable with handstands against a wall and have developed sufficient upper body strength. Here’s a step-by-step guide on how to perform handstand push-ups:
Note: Performing handstand push-ups requires a good level of strength, stability, and skill. Ensure you have adequate strength and proficiency in handstand holds before attempting this exercise. If you’re new to handstands, consider seeking guidance from a fitness professional. Additionally, perform this exercise in a safe environment with proper padding and clearance.
How to Do Wall-Assisted Handstand Push-Up
- Setup:
- Place a padded mat against a wall.
- Start in a standing position facing the wall.
- Kick Up to Handstand:
- Kick up one leg while simultaneously pushing off the other foot, aiming to balance in a handstand against the wall.
- Your hands should be placed slightly wider than shoulder-width apart.
- Handstand Position:
- Once in a handstand, your body should be in a straight line from wrists to ankles, with your stomach facing the wall.
- Perform the Push-Up:
- Lower your head towards the floor by bending your elbows.
- Keep your elbows at a 45-degree angle to your body.
- Descend until your head lightly touches the floor.
- Push Back Up:
- Push through your palms to extend your elbows and return to the handstand position.
- Descend Legs:
- Lower one leg at a time to return to the starting position.
Muscles Worked
- Shoulders (Deltoids): Handstand push-ups heavily engage the deltoid muscles, particularly the anterior (front) and lateral (side) deltoids.
- Triceps Brachii: The triceps are activated during the pushing phase of the handstand push-up.
- Upper Chest (Upper Pectoralis): The upper part of the chest is engaged as you press your body back up.
- Upper Back (Trapezius and Rhomboids): The upper back muscles play a role in stabilizing your body during the handstand position.
- Core Muscles: The core is engaged to maintain balance and stability throughout the exercise.
The Push-Up Burpee
The push-up burpee is a dynamic, full-body exercise that combines the elements of a push-up and a burpee. This compound movement targets multiple muscle groups and provides a cardiovascular challenge. Here’s a step-by-step guide on how to perform the push-up burpee.
How to do Push-Up Burpee
- Starting Position:
- Begin in a standing position with your feet shoulder-width apart.
- Perform a Squat:
- Bend your knees and lower your body into a squat position by pushing your hips back and down.
- Plant Your Hands:
- Place your hands on the ground in front of you, shoulder-width apart.
- Jump Back:
- Jump your feet back, landing in a plank position with your body in a straight line from head to heels.
- Perform a Push-Up:
- Lower your chest towards the ground by bending your elbows, keeping your body in a straight line.
- Push back up to the plank position.
- Jump Forward:
- Jump your feet forward toward your hands, returning to the squat position.
- Jump Up:
- Explosively jump up from the squat position, reaching your arms overhead.
Muscles Worked
- Chest (Pectoralis Major): The push-up component targets the chest muscles.
- Shoulders (Deltoids): Both the anterior (front) and lateral (side) deltoids are engaged during the push-up and jump phases.
- Triceps Brachii: The triceps are activated during the push-up.
- Leg Muscles (Quadriceps, Hamstrings, Glutes): The squat and jump phases involve the muscles of the legs.
- Core Muscles (Rectus Abdominis, Transverse Abdominis): The core is engaged to stabilize the body during the push-up and jump.
- Back Muscles (Erector Spinae): The muscles of the lower back are engaged to maintain a straight back during the exercise.
- Cardiovascular System: The continuous and dynamic nature of the push-up burpee makes it an effective cardiovascular exercise.
FAQs
Can push-ups help with weight loss?
While push-ups alone may not directly lead to significant weight loss, they contribute to overall calorie burn and can be part of a well-rounded fitness routine that supports weight management.
Is the push-up burpee suitable for beginners?
The push-up burpee is a high-intensity exercise that may be challenging for beginners. It’s recommended for individuals with some fitness experience. Beginners may start with modified versions or break down the components of the exercise to build strength and coordination.
How can I modify the push-up burpee for a lower intensity?
To modify the push-up burpee, you can perform the movements at a slower pace, omit the jump, or reduce the depth of the squat. Beginners may start with a simplified version and gradually progress to the full push-up burpee as their fitness level improves.
How many push-up burpees should I do in a workout?
The number of push-up burpees depends on your fitness level and workout goals. Beginners may start with a lower number (e.g., 5-10 repetitions) and gradually increase over time. For a high-intensity workout, you can incorporate sets of 15-20 repetitions or follow a specific workout routine.
What is the difference between standard, diamond, and wide push-ups?
Standard push-ups target the overall chest and triceps. Diamond push-ups focus on the inner chest and triceps, while wide push-ups target the outer chest and shoulders.